Yeah I know, Modge Podge? For those of a certain age, you just CRINGED when you saw Modge Podge, didn't you?
I know, I know, but there is SO much you can do knowadays with the gorgeous scrapbook papers and fabrics! I won a copy of the 40th anniversary book from the Modge Podge blog, and it really has inspired me.
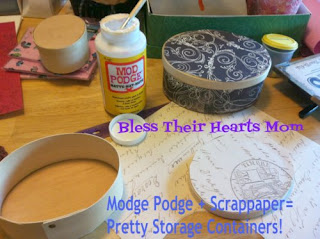
So while reorganizing, redecorating, moving everything around in our upstairs multi-purpose/crafting/sewing/chilling room, I came across some unfinished storage boxes and decided to 'pretty them up' with some of the 500 hundred scrapbook papers I have (seriously I think that's the right amount after putting them in storage holders! More on that later!), and using Modge Podge.
So here's some photos of the process and final result. Maybe it will inspire you too!
 When going around to the backside, you meet where the boxes are nailed. I found that is you take the paper right up to it, then bend back, to make a tight seal, under the edge, the paper works better, and you can get a better look on the back.
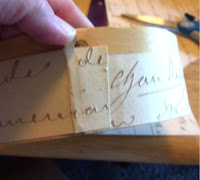 After the bend, then bending back over the lip is easy. The end result as you can see is a nice line on the edge. I cut the angled edge so it lined up better with the writing, after sealing the edge. And yes, I realize my papers didn't line up all the way around. I wasn't too worried, as it was the backside. I found that the lids did NOT go down with the paper glued all the way up to the upper edge, so I cut them down, so the lids would stay down tight. Hence the 1/4th open from the top.

Not bad looking when up on a shelf, but I am gong to go back and add some trim, to cover where the edges on the top didn't quite meet the sides- after I got done I realized there was a lip that was undercut, giving the leftover edge. But it's perfect for some craft paint or trim, so once I figure what I have to use, I'll finish them some more.
I like how the colors worked out so well together, and when they are stacked, they look like they blend from one to another. Now I just have to decide what to store in them!
I know, I know, but there is SO much you can do knowadays with the gorgeous scrapbook papers and fabrics! I won a copy of the 40th anniversary book from the Modge Podge blog, and it really has inspired me.
So while reorganizing, redecorating, moving everything around in our upstairs multi-purpose/crafting/sewing/chilling room, I came across some unfinished storage boxes and decided to 'pretty them up' with some of the 500 hundred scrapbook papers I have (seriously I think that's the right amount after putting them in storage holders! More on that later!), and using Modge Podge.
So here's some photos of the process and final result. Maybe it will inspire you too!

As you can see, simple wooden storage containers, and one page of scrapbook paper, per box, with leftovers, as I decided to mix around the papers.

 After the bend, then bending back over the lip is easy. The end result as you can see is a nice line on the edge. I cut the angled edge so it lined up better with the writing, after sealing the edge. And yes, I realize my papers didn't line up all the way around. I wasn't too worried, as it was the backside. I found that the lids did NOT go down with the paper glued all the way up to the upper edge, so I cut them down, so the lids would stay down tight. Hence the 1/4th open from the top.
The end result:

I like how the colors worked out so well together, and when they are stacked, they look like they blend from one to another. Now I just have to decide what to store in them!
Comments
Post a Comment