
Ok that title probably made you go 'what????'
Ask any mother or grandmother who has heard
"can you fix my wings?" for the 80th time in 2 hours,
and she can tell you exactly what it means!
Don't get me wrong, I'm like anybody else,
I don't want to pay a lot for wings that will take a beating, get crushed, go down slides,
through doorways (straight), and pretty much get mangled.
I understand the makers make them for kids 3-16, so the arm elastic is BIG,
BUT I get tired of hearing the fix it question,
especially on Halloween!

So I have come up with 2 solutions- each depends on which type of wings you have.
(that is a close up of the wide wings above, you can see how they bend back in the middle
(of the black center piece), and hence fold up when worn). Course you could do the short form on long wings, just depends on how they fit...
Long Wings:
Longer wings like Kiddo's Tinker Bell wings, have a longer center piece in the middle (see picture).

The simple solution is to take a hair tie and wrap it around the BOTTOM of the middle piece until the wings stay straight. Easy peasy, and can be done on the go.
Short Wings
Not so easy- these require oh about 15 minutes to fix (really 5, but you have to allow for drying time!

First get your items together: wings, Alene's super quick dry tacky glue (highly recommend you have a gallon of this stuff at ALL times!), heavy cardboard, fabric to match your center part of the wings, self stick velcro strips to match the back of your wings
Determine how big to cut your cardboard- as you can see I went about 1/3 of an inch OVER the center back of the wings. Depending on how heavy your cardboard is, you will need 2-4 layers. As you can see, I did 4 latyers- I used the cardboard the wings came on.
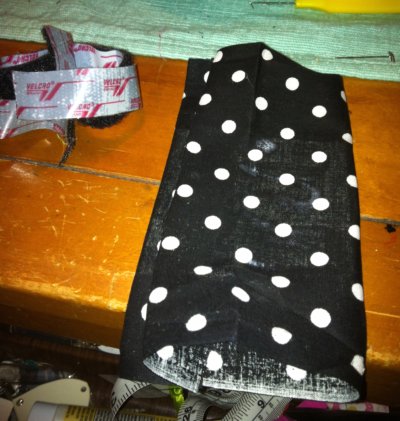
Glue all the layers together. Make sure to press hard and hold down for count of 20 to make sure the tacky glue starts to set.

Now place your board on the fabric and determined how much you need. No science here- wrap it like a present basically- you want to thicken the board up a bit and give it a little padding. Cut and start gluing the fabric to the board. Again, make sure you press down tightly to secure and set the glue, before moving onto the next section to glue. You will then have a nice pretty square.

It is best to then put your square right above the back, so you can see where to line up your other 2 velcro strips. Taking the knubby velcro strips, peel the back and place on your piece, where they correspond to the back of the wings.
Exhausted yet? LOL

Now place the cardboard piece onto the back of the wings. Hold up and realize the wings now have sway but they do NOT close up. AND you can take the backing piece OFF (love the velcro don't ya?) and still fold the wings up for storage.
Do a happy jig, tell yourself you are super mom/grandma, go get a cup of coffee and be sure to expound on HOW long it took you to fix the wings when you kid comes in and screeches in joy. Wring some extra hugs and kisses...
Hope this helps!
You make it look so simple. I love the idea. If you have time stop by my blog anniversary party.
ReplyDelete