Disclosure / Disclaimer: I received this info, free of charge,from Fox Chapel Publishing, for blog posting purposes on this blog. No other compensation, monetary or in kind, has been received or implied for this post. Nor was I told how to post about it, all opinions are my own.

If you haven't guessed it, it's ALMOST officially FALL
(officially it's next week, on the 22nd!).
Though I'm sure ALL those pumpkin recipes, pumpkin coffee commercials
and the like, pretty much gave it away. LOL
So as fall officially arrives a mere 5 WEEKS
from one the most important holidays of the year, I thought i might be perfect timing
to share this great giveaway and the recipe for carving a perfect pumpkin!

I'll be reviewing the book later on, but for now, check out this easy how to!
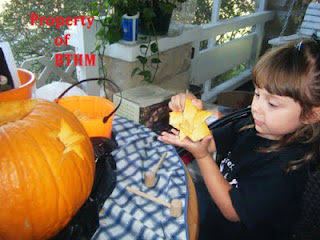
Here they are, the very essentials of pumpkin carving! By following these steps that you probably had down pay when you were a kid, you can get carving with any traditional pumpkin carving pattern. You’ll need a little elbow grease and a tolerance for mess to use this technique, but it’s totally worth it.
Pre-Carving Pumpkin Prep
1.Clean the Pumpkin
Prep the pumpkin first by rinsing it in cold water and using a scrub brush to remove dirt. If you want, you can spray the entire pumpkin with a mild bleach and water solution to kill mold and bacteria.

2.Cut out the Lid
Use a sturdy knife to slowly and carefully carve out and remove the lid of the pumpkin, going in at an angle rather than straight down in. Alternatively, you can cut a hole in the bottom of the pumpkin, which will mean you can sit your pumpkin on top of a light rather than placing a light inside the pumpkin.

3.Clean Out the Guts
Use a scoop to completely empty the inside of the pumpkin of flesh and seeds. Keep scraping away at the inner walls of the pumpkin until you only have about a 1” (2.5cm) thick pumpkin wall that is nice and smooth.

4.Attach the Pattern
Transfer the pattern using your desired method.
Check out Easy Pumpkin Carving for tons of patterns to choose from.
Transfer the pattern using your desired method.
Check out Easy Pumpkin Carving for tons of patterns to choose from.

Carving Tips
Actually carving your pumpkin is simple enough.
Here are some tips to make carving easy and effective:
-Saw steadily with a continuous up and down motion, and don’t press too hard or try to go too fast.
-When you’re finished cutting out a standalone piece (like an eye), pop it out of the pumpkin wall with your finger, not your carving tool.
-To cut clean, sharp corners, remove and reinsert the carving tool.

-To cut clean, sharp corners, remove and reinsert the carving tool.
-Carve starting from the inside of the design and working your way outward.
-Resist the urge to put your free hand inside the pumpkin while carving. Only do so if you can clearly see where all of your hand is.
-If you accidentally break off a part of your carving as you work, such as a protruding tooth, stick it back on with a toothpick!


Preserve Your Pumpkin!
Keep your carved pumpkin cool and out of the direct sunlight (you can even put it in the fridge). You can also coat the interior and all cut edges with petroleum jelly to help lock in the pumpkin’s natural moisture, or purchase special preservative sprays for pumpkins.

And now for the giveaway!
Our friends over at Fox Chapel Publishing
are giving away not 1, but TWO pumpkin carving books
to THREE lucky winners!!!
Just click the picture below to click over to enter to win!

About the Author;
Colleen Dorsey is a writer specializing in the craft and hobby industry, and an editor at Design Originals and Fox Chapel Publishing. Colleen has edited books on many topics, including foam and paper crafts, jewelry making, and children's crafts. She graduated from Johns Hopkins University with a degree in creative writing, and in her spare time she enjoys writing fiction, making jewelry, and upcycling findings into crafty new items.
Comments
Post a Comment