Disclosure / Disclaimer: I received this product, free of charge, from Touch if Urban/Ayat, via Tomoson, for review purposes on this blog. No other compensation, monetary or in kind, has been received or implied for this post. Nor was I told how to post about it.


Sometimes you just want to shake up the old dessert menu, right?
Maybe it's a special occasion, a reward for a job well done, or just because!
This new silicone cake pan from Touch of Urban might JUST be what you're looking for!

This Nonstick Baking Pastry Mat is made of BPA free silicone and comes in 7 different colors, so you can match the ones you already have! It is of a good size, being 23"x 29" x.09" thick. This gives you a small, but decent size cake roll.

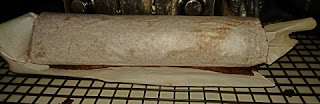
As you can see, I have it on a traditional jelly roll baking sheet. honestly, I much prefer the smaller size, as it is easier to roll up and to cool. The pan can hold about half of a traditional cake mix, so you can either half your recipe, your make 2!
Now word of caution. On my first try, I did NOT use a layer of parchment paper because it's a silicone pan, and instructions said you didn't have to.
Right....
Yeah, my cake cracked and fell apart the minute I tried to roll it. SIGH.
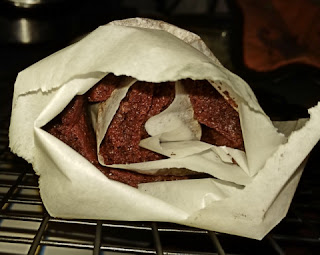
So what do you with a cake pan full of crumbs?
Yup, cake pops! (more on them after we talk about the pan!)
So round two had a full parchment liner!

I used a traditional chocolate cake mix for my review cake. it only took 14 minutes in the oven (at 400 degrees) for the cake to be done- which is great if you're short on baking time!

Then you let it cool slightly, then quickly roll up. the parchment and the pan made this SO SO SO easy! I can remember rolling yule log cakes up with my grandmother, having to use linen towels and it was not simple! This may not have looked pretty, but I was thrilled it stayed together in ONE piece! Then you let it cool while you make your frosting!

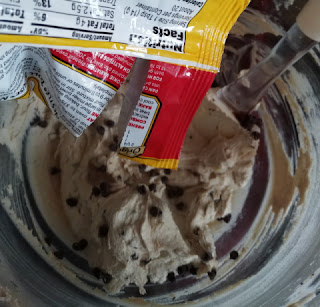
I decided to go with a simple chocolate cookie dough frosting recipe, so that the cake would be a combination of a traditional snack cake and cookie, all at the same time! It's a very simple butter cream frosting recipe: 1 1/2 cups powdered sugar, 1/2 cup brown sugar (they key here-do NOT substitute regular sugar), 8 tablespoons butter, 2 tablespoons cream cheese (you can use more butter if you don't have it, but I like the richness it gives it),1 teaspoon Neilsen-Massey vanilla extract, 1/2 cup microwave treated flour (which I learned to do in The Edible Cookie Dough cookbook), 1/8 tsp salt, 2 tablespoons milk and mini chocolate chips. Once I had the frosting made, without the chips, I tested to see if it was too thick for the roll, and added a bit more milk, before adding the chips. The kid declared it 'da bomb' and would have ate the whole thing, if I had let her! LOL

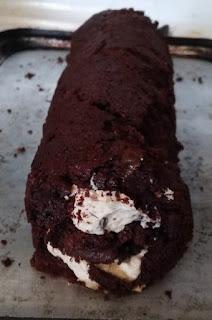
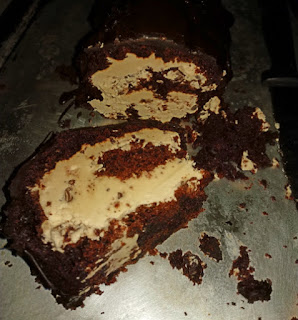
So i unrolled the cake on the baking pan, and covered with 3/4 of the frosting (yes, I knew my troops would want a THICK layer of this frosting! Normally, I would have gone with about half. Then rolled it back up! Not too shabby! But I did have a few cracks starting on the top, so I went ahead and made a simple chocolate ganache and added it to the top.

The ganache definitely added a more snack cake feel to the roll. And yeah, it would have looked better with less of the frosting, so I could have gotten a tighter roll, but the troops were VERY happy with it, so lesson learned for next time!

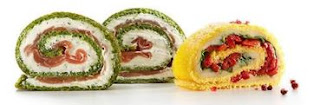
The pan was super easy to clean, even the first time, with the cracked cake! And it dried quickly, allowing me to move on to my second attempt. I love the pan and will definitely be making more cake rolls in the future! But I also love that you can use the cake pan for more than just cake! You can use sticky rice and use it to make your own large sushi rolls, rolled omelets, rolled crepes with fruit, or even sandwich rolls! The possibilities are endless! So head on over and pick up your own Nonstick Baking Pastry Mat , and see what fun you can have with it!

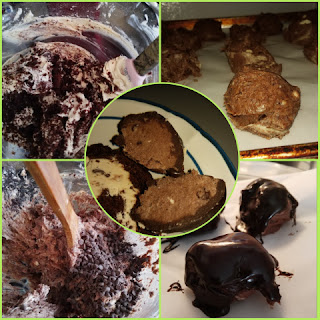
And speaking of fun, i didn't forget about that leftover cake!
I made up another half batch of the chocolate chip cookie dough frosting and added it to the leftover frosting and crumbled chocolate cake. We were going to make cake pops, but then realized we had no sticks left! Whoops! So plan B, they became truffles by adding in 3/4 of a block of cream cheese (which makes it a job for a wooden spoon!), and melting some chocolate to add to the leftover ganache, to cover them. Somebody MIGHT have gotten a bit carried away with the chocolate, LOL, BUT they taste GREAT! And yes, they are on the XL size, because we were running out of time and had to get them done, with allowing for time for them to harden in the freezer, before I had to go to work! But the guys LOVED the larger size and they taste great, so it's a recipe we'll keep handy for holiday cooking too!
Comments
Post a Comment